

Table of Contents
- How to Anchor Pergola Posts to Concrete: The Right Way
- Picking the Best Pergola Post Base for Concrete
- Pergola Installation Tools and Materials Checklist
- Step-by-Step: Installing Your Pergola on Concrete
- Common Pergola Installation Mistakes to Avoid
- Permits, Codes, and Long-Term Maintenance for Concrete-Mounted Pergolas
- Conclusion: Build It Right the First Time
- Frequently Asked Questions
Last Updated: October 14, 2026
How to Anchor Pergola Posts to Concrete: The Right Way
Anchoring a pergola to concrete comes down to three things: a sound slab, the right post base, and anchors rated for your wind exposure.
This guide from Pergola World walks through the full process, from checking your slab to tightening the final anchor.
A post base is the metal bracket that connects a wooden post to a concrete surface. It keeps the wood off the concrete and transfers load into the slab.
Below, we’ll show you exactly how to pick anchors, set bases, and raise a structure that stays plumb and solid.
Never anchor into a slab you haven’t checked for thickness or cracks. A thin or fractured slab can pull loose under wind load, and the repair means cutting out and repouring concrete.
Picking the Best Pergola Post Base for Concrete
The best post base for concrete is a standoff bracket that holds the post above the slab surface. This gap stops water from wicking into the wood and lets air dry the end grain.
Three base styles dominate:
- Standoff base: Raises the post about 1 inch off the concrete. Best for most installations.
- Flush base: Sits flat on the slab. Cheaper, but traps moisture.
- Elevated base: Higher clearance for wet climates or poor drainage.
Match the base to your post size. A 6×6 post needs a 6×6 base, not a 4×4 bracket with shims. A base that is undersized for the post concentrates load on a small footprint and can deform under wind uplift.
Match the Anchor to the Slab, Not Just the Base
A common pattern is to buy a base and grab whatever anchor is on the shelf. That is how connections fail. Use this decision guide instead:
- Wedge anchors expand against the concrete and offer high pull-out strength in a thick, uncracked slab. They are the default for a sound 4-inch-or-thicker pour. They are a poor choice in thin or fractured concrete because the expansion can spall the slab.
- Concrete screws cut threads into the concrete and work well in thinner slabs, and they can be removed later if you need to reposition a base. They generally hold less than a wedge anchor of the same diameter, so they suit smaller, lighter pergolas or sheltered sites.
- Adhesive anchors bond a threaded rod into the hole and perform well in cracked concrete or where vibration is a concern. They take longer to cure and are harder to remove, but they are the most forgiving when slab condition is uncertain.
Size the Connection to the Load
Anchor count and diameter should scale with the structure, not with habit. A small single-bay pergola on a sheltered patio needs far less holding power than a large multi-bay structure on an open, windy site.
Hardware brands like Simpson Strong-Tie and OZCO make bases with powder-coated finishes. That coating resists rust in coastal or humid areas. Look for bases and fasteners rated for exterior use and, in coastal air, specify stainless or hot-dip galvanized hardware rather than plain zinc.
At Pergola World, our kits ship with hardware from leading manufacturers.
Do not mix anchor types across a single base plate. Different anchors expand, cut, or bond differently, and mixing them can load one hole harder than the others and crack the slab.
Pergola Installation Tools and Materials Checklist
Gather everything before you drill. A missing bit or anchor stops the job halfway.
Tools:
- Hammer drill with a masonry bit
- Cordless impact driver
- Socket set
- Tape measure and chalk line
- 4-foot level
- Post level
- Shop vacuum
Materials:
- Post bases with standoff
- Wedge anchors or concrete screws
- Wood screws for the post-to-base connection
- Shims
- Temporary braces
- Safety glasses and hearing protection
Match your anchor type to your slab. Wedge anchors need a solid, uncracked slab. Concrete screws work well in thinner slabs and can be removed later.
Buy one extra anchor and bit of each size. Masonry bits dull fast in old concrete, and a spare saves a mid-project store run.
Step-by-Step: Installing Your Pergola on Concrete
Two people make it faster and safer. Work in shade if you can, since concrete radiates heat.
Here’s the sequence that keeps everything square.
Step 1: Inspect the Slab and Check for Utilities
Start with the slab. A pergola on concrete is only as strong as the concrete beneath it.
Check these items:
- Thickness: Aim for at least 4 inches. Thinner slabs may need different anchors.
- Cracks: Hairline cracks are usually fine. Wide or shifting cracks are a warning sign.
- Reinforcement: Rebar or mesh inside the slab adds holding power.
- Drainage: Water should flow away from the posts, not pool around them.
Call 811 before you drill. This free service marks buried utility lines. Hitting a gas or power line is dangerous and expensive.
For code questions, check your local building department. Wind-load rules vary by region, and FEMA’s wind zone guidance explains how exposure changes by area.
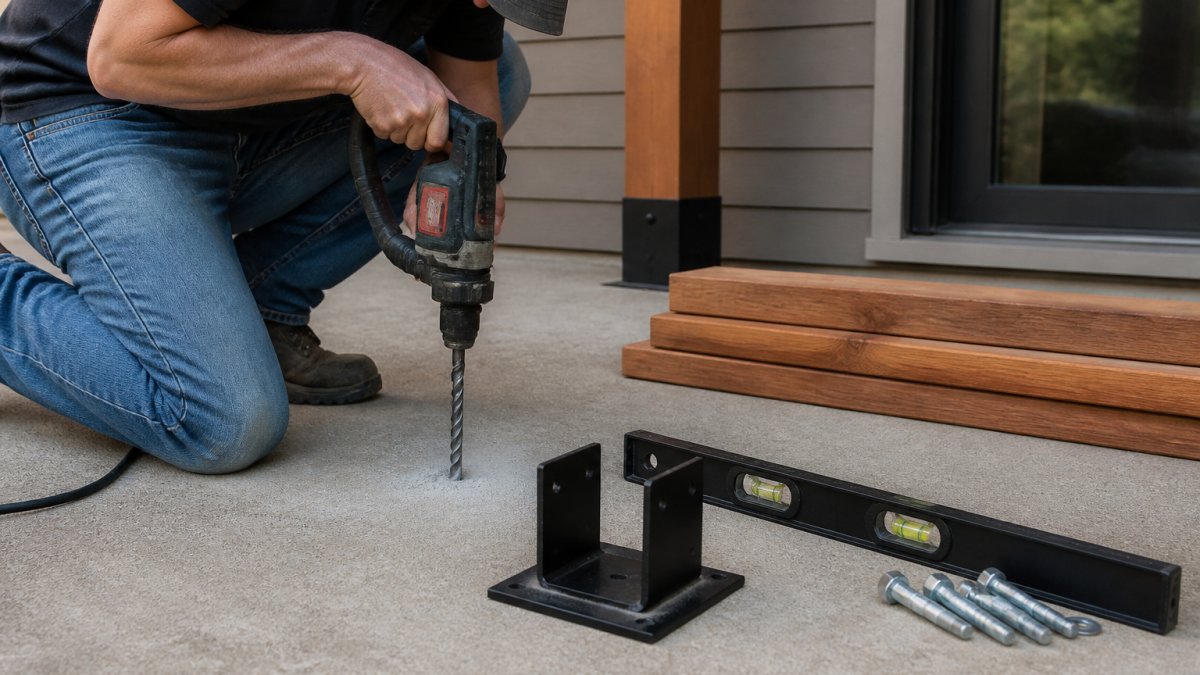
Step 2: Mark Post Locations and Drill Anchor Holes
Measure twice, mark once. Layout errors are the number one cause of a wonky frame.
- Measure your kit’s post spacing from the plans.
- Snap a chalk line for the outer edge.
- Mark each post center.
- Square the layout using the 3-4-5 method.
- Set each base in place and mark the anchor holes.
Drill with a hammer drill and the bit size stamped on your anchor package. Bore to the full depth the anchor needs, then vacuum the dust out. Dust left in the hole weakens the grip.
Step 3: Set Post Bases, Raise Posts, and Secure the Structure
Set each base, then drive the anchors. Tighten them snug, not gorilla-tight. Over-torquing strips the hole.
Now raise the posts. Slide each one into its base and hold it plumb with a temporary brace. Check plumb on two faces, not one.
Fasten the post to the base with the supplied screws. Then add beams and rafters per your kit’s instructions. Recheck level and plumb before you remove the braces.
The base holds the post. The anchor holds the base. Skip either and the whole structure relies on friction, which wind defeats.
Common Pergola Installation Mistakes to Avoid
Most problems come from a short list of avoidable errors. Watch for these.
- Drilling without checking for utilities. Call 811 first, every time.
- Using the wrong anchor for the slab. Wedge anchors fail in thin or cracked concrete.
- Skipping the standoff. Wood sitting flat on concrete rots at the base.
- Forgetting to brace. An unbraced post shifts before you finish the frame.
- Over-tightening anchors. This cracks the concrete and ruins the hold.
- Ignoring wind exposure. Open sites need more anchors and heavier hardware.
A common mistake is treating all slabs the same. An old patio with hairline cracks behaves nothing like a fresh pour. Test one anchor first, then commit.
Permits, Codes, and Long-Term Maintenance for Concrete-Mounted Pergolas
Many areas require a permit for a pergola, especially if it is attached to a house, exceeds a certain height, or covers more than a set square footage. Rules differ by city and county, so confirm before you build. Pulling a permit is not just paperwork, the review is where wind load and anchorage get checked, and an unpermitted structure can complicate a future home sale or insurance claim.
What Drives the Code Review
Two things drive the review: wind load and anchorage. Even a slab-mounted pergola may need anchors rated for your region’s wind speed. Your building department can tell you the design wind speed for your address, and that number sets the minimum uplift your connection must resist.
A few practical points:
- Wind exposure matters as much as wind speed. An open field, a hilltop, or a waterfront lot sees higher loads than a sheltered backyard, even in the same wind zone. FEMA’s wind zone guidance explains how exposure changes by area.
- Height and attachment raise the bar. A tall pergola, or one tied to the house, usually faces stricter requirements than a low freestanding structure.
- Frost and soil are not the issue here. Because the load goes into an existing slab rather than a footing, the slab itself becomes the anchorage, which is why the inspection step earlier in this guide matters so much.
- Keep documentation. Save the permit, the approved plans, and the anchor manufacturer’s load ratings. They help if you ever sell, insure, or modify the structure.
If your slab cannot meet the requirement, the fix is not a bigger anchor. It is a new footing or a thickened slab section, and that is a conversation to have with your building department before you drill.
Maintenance That Keeps the Connection Sound
Maintenance keeps the structure sound, and the connection is where you should look first:
- Check anchors and screws each spring, and after any major storm.
- Re-tighten anything that loosened over winter. Seasonal freeze-thaw cycles work fasteners loose.
- Look for rust streaks, white corrosion powder, or staining on the concrete around a base, all signs the hardware is degrading.
- Touch up scratched powder coating to stop rust before it spreads.
- Keep water draining away from the base. Pooling water at the post accelerates rot and corrosion.
- Reapply finish to cedar or fir as needed, and inspect the end grain where it meets the standoff gap.
Stainless or coated hardware lasts far longer in humid or coastal air. Cheap zinc hardware rusts fast and stains the concrete.
Signs the Connection Is Failing
Stop and investigate if you see any of these:
- A base plate that rocks or lifts when you push on the post.
- Cracks radiating from an anchor hole in the slab.
- A post that has gone out of plumb since installation.
- Rust weeping from under a base plate.
Any of these means the anchorage is compromised. Do not simply tighten the anchor and move on, inspect the slab around the hole and, if the concrete is cracked or crumbling, consult a contractor before reloading the connection.
For wood care guidance, the USDA Forest Service’s wood handbook covers how different species handle moisture and decay.
Permits and maintenance are the same job seen from two ends: the permit confirms the connection can take the load, and maintenance confirms it still can. Check both, and the pergola stays put.
Conclusion: Build It Right the First Time
A pergola on concrete rewards patience. Inspect the slab, pick the right base, and match your anchors to the wind and the concrete. Do that, and the structure holds for years.
Pergola World offers custom-cut cedar and Douglas fir kits, pre-cut profiles, and pre-stained options. Our hardware comes from trusted brands like Simpson Strong-Tie and OZCO, and our design team can help you plan around an odd layout or tight corner. Every kit is built to assemble fast and last.
Get a free estimate from Pergola World and start planning a structure that stands up to the weather, season after season.
Frequently Asked Questions
Can I install a pergola on concrete without drilling?
You can use weighted bases filled with sand or gravel, but they are not recommended for permanent installations. Drilling and anchoring with wedge anchors or concrete screws provides the structural stability needed to resist wind uplift and lateral loads. For a safe, long-lasting pergola on concrete, always drill and anchor.
How do I check whether my concrete patio can support a pergola?
Check slab thickness (aim for at least 4 inches), look for large cracks or spalling, and confirm reinforcement (rebar or mesh) if possible. A 4-inch reinforced slab in good condition can support a typical pergola. If the slab is thin or cracked, consult a structural engineer or consider an in-ground footing alternative.
What type of anchor should I use for pergola posts on concrete?
For most residential pergolas, 1/2-inch wedge anchors or concrete screws (like Tapcons) work well. Choose stainless steel or hot-dip galvanized anchors for corrosion resistance. Match anchor length to embedment depth: typically 2-1/2 to 3 inches into the concrete. Always follow the anchor manufacturer’s spacing and edge distance requirements.
Do pergola posts need to be installed in the ground or on concrete?
Both methods work, but concrete mounting is faster and avoids digging. In-ground posts offer more lateral stability in high-wind areas but require footings below the frost line. For existing patios, surface mounting with proper anchors and post bases is a practical choice that meets most building codes when done correctly.
