

Last Updated: November 2, 2026
Quick Summary
Pergola assembly is the process of joining pre-cut posts, beams, and rafters into a rigid frame and anchoring it to a footing or existing slab. For beginners, it starts with planning location, kit type, and foundation before buying anything. Most kits follow the same sequence: lay out the frame flat, join components, then raise and anchor it.
- Walk your yard at three points in the day to check sun, drainage, and property lines.
- Stage hardware in labeled zip bags by assembly step the night before.
- A second pair of hands is not optional on beams longer than about 8 ft.
- Over-torquing a concrete anchor can strip the hole and leave a loose post.
- If footings are involved, add a separate prep day so cure time does not eat your assembly window.
Table of Contents
- Planning Your DIY Pergola Project
- Pergola Assembly Tools and Materials Checklist
- How to Assemble a Pergola Kit: Step-by-Step
- Pergola Installation on Concrete: Anchoring and Safety
- Pergola Assembly Time: What to Expect
- Common Beginner Mistakes and Troubleshooting
- Get Your Free Estimate from Pergola World
- Frequently Asked Questions
Planning Your DIY Pergola Project
DIY pergola assembly for beginners starts with a single decision: where the structure goes and what it sits on. Get that wrong and every step after it fights you. Before you order a single timber, walk your yard at three points in the day and note where sun actually lands, where drainage pools after rain, and how close the nearest property line sits.
Pergola assembly is the process of joining pre-cut posts, beams, and rafters into a rigid frame and anchoring it to a footing or existing slab. The planning stage decides three things: location, kit type, and foundation. Everything else is execution.
A common mistake is buying the kit first and finding the spot second. Work the other way around. Measure the footprint you want, confirm your local building department’s rules on setbacks and permits, and check for buried utilities before you dig. The U.S. Consumer Product Safety Commission guidance on outdoor structure safety is a reasonable starting point for what to check, though your municipal building office is the authority on permits.
Pergola Assembly Tools and Materials Checklist
Most beginner assembly stalls happen because a fastener is missing partway through the job. Lay everything out the night before and group it by stage, layout, anchoring, frame, and finish, so you are not digging through a bucket mid-raise. Here is a general checklist, with quantities sized for a typical 10 ft x 12 ft freestanding kit and alternatives where a substitute works.
Layout and measuring
- 25 ft tape measure (a 16 ft tape runs short on diagonal checks for larger footprints)
- 4 ft level and 2 ft level, the 2 ft is for checking post faces; the 4 ft is for beams and rafters
- Carpenter’s square or a 12 in. speed square
- Chalk line and marking pencil
- String line and two stakes for squaring the footprint
Site prep and anchoring
- Post-hole digger or auger (manual is fine for four holes; rent a power auger for rocky soil)
- Wheelbarrow and mixing tub
- Concrete mix, roughly 1 to 2 bags per footing depending on hole size and kit instructions; check the manufacturer’s footing spec before buying
- Hammer drill with masonry bits matched to your anchor diameter (for slab anchoring)
- Torque wrench, worth renting for screw anchors
- Shop vacuum or a blow-out bulb for clearing drilled holes
Frame assembly
- Cordless drill/driver with a spare battery
- Impact driver (optional but speeds up lag and structural screw driving)
- Hex key set and socket set matched to the kit’s bolts
- Rubber mallet and dead-blow hammer
- Clamps, at least four bar clamps for holding end frames while you check square
- Temporary bracing lumber (2x4s) and screws for holding posts plumb during the raise
Hardware and fasteners
- Structural screws, bolts, and joist hangers exactly per the instructions, do not substitute lengths
- Post bases, a 6×6 post base keeps the wood off the slab and out of standing water
- Concrete anchors, a heavy-duty screw anchor such as the Titen HD 1/2 in. x 5 in. mechanically galvanized anchor does the job without epoxy
- Washers sized to the bolts (kits sometimes skimp here)
Safety and helpers
- Safety glasses, work gloves, and hearing protection if using an impact driver
- A second pair of hands for the raise-and-brace steps, this is not optional on beams longer than about 8 ft
A note on substitutions: a 3/8 in. anchor is not a drop-in for a 1/2 in. anchor, and a deck screw is not a structural screw. If the kit specifies a fastener, match the diameter, length, and coating. Buying one spare of each bolt and a handful of extra structural screws costs little and saves a return trip.
Stage hardware in labeled zip bags by assembly step the night before. It sounds fussy; it is the single biggest time-saver on raise day.
How to Assemble a Pergola Kit: Step-by-Step
Assembling a pergola kit means laying out the frame flat, joining the components with the supplied connectors, then raising and anchoring it. Most kits follow the same sequence, and following it in order prevents the twisted-frame problem that ruins beginner builds.
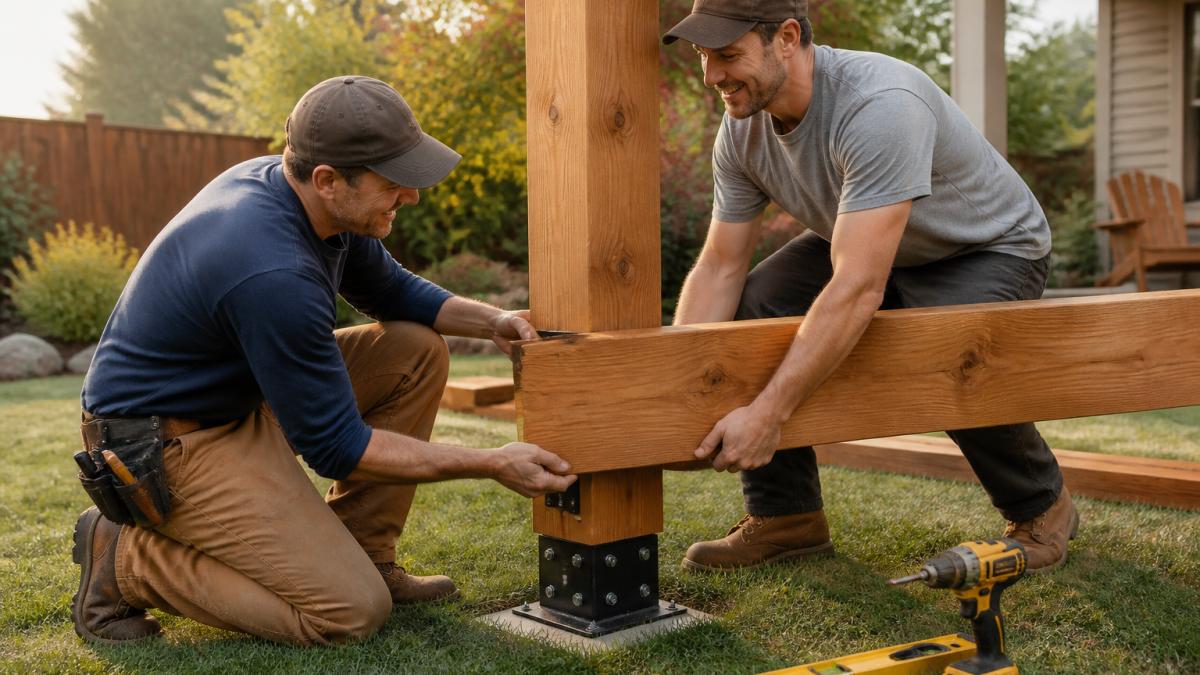
- Stage the parts. Sort posts, beams, rafters, and hardware into piles matching the instructions.
- Lay out the frame on the ground. Assemble the two end frames flat, square each corner with a carpenter’s square, and check diagonals match.
- Attach the post bases. Bolt each base to its post before the post goes upright.
- Raise and brace the posts. Set the two end frames, clamp temporary braces, and check plumb with a level on two faces.
- Install the beams. Set the long beams into the post connections and secure with the specified fasteners.
- Add rafters. Space them per the instructions, typically evenly across the span, and fasten each end.
- Re-check square and level. Tighten every fastener only after the frame reads true.
Custom-cut cedar and Douglas fir with optional pre-cut profile ends can reduce the measuring and cutting involved in assembly.
Pergola Installation on Concrete: Anchoring and Safety
Pergola installation on concrete is generally less forgiving of layout errors than digging footings. You cannot nudge a hole; you drill where you mark. Mark all four corners, check the diagonals, and only then drill.
Use a hammer drill with a bit matched to your anchor diameter, drill to the specified depth, and clear the dust from each hole. Screw anchors torque down to a set value, so a torque wrench is worth renting. Watch out: over-torquing a concrete anchor can strip the hole and leave you with a loose post and no easy fix.
Wind uplift is the real risk on an exposed slab. A freestanding pergola that is not anchored properly can lift in a storm.
Pergola Assembly Time: What to Expect
Pergola assembly time depends on the kit, the site, and how many people are working. Break the job into stages and budget each one separately.
Task-level time estimates (two people, flat slab, kit with pre-cut parts)
- Layout and squaring: 30 to 60 minutes
- Staging and sorting parts: 30 minutes
- Assembling end frames flat: 60 to 90 minutes
- Raising and bracing posts: 45 to 60 minutes
- Setting beams: 30 to 45 minutes
- Installing rafters: 60 to 90 minutes
- Final square, level, and torque check: 30 minutes
- Cleanup: 30 minutes
That lands a straightforward freestanding kit on a flat slab at the low end of the range. A larger structure with footings, louvers, or a wall-mounted side runs longer, often a full day plus a second half-day for anchoring, bracing, and cleanup.
Solo versus two-person
Solo assembly is possible on small kits but slow, and lifting beams alone is where injuries happen. Working alone takes longer, and recruiting one person for the raise-and-brace steps is advisable regardless. The frame assembly can be a solo job; the raise should not be.
Foundation and curing time
If you are setting concrete footings, add the dig time (roughly 30 to 60 minutes per hole in ordinary soil) and remember that concrete needs to cure before you load it. Most bagged concrete mixes specify a waiting period before anchoring or bearing load, check the bag, because rushing this step is how posts end up out of plumb. Slab anchoring skips the cure wait but adds drilling and dust-clearing time per hole.
A realistic schedule
If footings are involved, add a separate prep day for digging and pouring so the cure time does not eat your assembly window.
Budget the raise-and-brace stage as its own block with a helper present. It is the shortest stage on paper and the longest in practice when something is out of plumb.
Here is how the stages break down for two people on a flat slab with a pre-cut kit.
| Stage | Time estimate |
|---|---|
| Layout and squaring | 30 to 60 minutes |
| Staging and sorting parts | 30 minutes |
| Assembling end frames flat | 60 to 90 minutes |
| Raising and bracing posts | 45 to 60 minutes |
| Setting beams | 30 to 45 minutes |
| Installing rafters | 60 to 90 minutes |
| Final square, level, and torque check | 30 minutes |
| Cleanup | 30 minutes |
Common Beginner Mistakes and Troubleshooting
A common beginner error is assembling out of square and discovering it later. If your frame is racked, stop and re-check the diagonals before adding rafters. Our step-by-step guide to leveling a pergola frame walks through the fix.
A crooked frame usually traces to one post out of plumb or a base set on uneven ground. If your site isn’t level, follow our steps to install pergola kits for uneven ground.
Other frequent problems:
- Fasteners driven without pre-drilling, splitting the timber
- Skipping the level check between steps instead of after each one
- Leaving temporary braces on too long, then finding the frame has settled
Get Your Free Estimate from Pergola World
Building a pergola that stays square, level, and anchored through a decade of weather is harder than the videos suggest. At Pergola World, we supply custom-cut cedar and Douglas fir, optional pre-cut profile ends and pre-stained lumber, and hardware from brands like Simpson Strong-Tie and OZCO. Our team also offers personalized design consultations. Get started with Pergola World and build a structure that holds its line.
Frequently Asked Questions
Can a beginner assemble a pergola?
Yes, most homeowners with basic DIY skills can assemble a pergola kit, especially when it includes pre-cut lumber and clear instructions. The key is careful planning, having the right tools, and ideally a helper for lifting beams. Pergola World offers custom-cut cedar and Douglas fir kits with optional pre-stained pieces to simplify the process.
What tools do I need to assemble a pergola?
You’ll need a measuring tape, 4-foot level, cordless drill with driver bits, socket set, rubber mallet, ladder, and work gloves. For concrete installation, add a hammer drill and masonry bits. A post-hole digger is necessary for ground-level footings. Pergola World carries hardware from brands like Simpson Strong-Tie, and you supply the tools. Having a helper and a second ladder speeds up beam placement.
How long does it take to assemble a pergola kit?
Most DIY pergola kits take 4 to 8 hours for two people to assemble, depending on size and complexity. A simple 10×10 freestanding kit might take 4-6 hours, while a larger wall-mounted unit with louvers could take a full day. Site preparation, foundation work, and any custom modifications add time.
How do you anchor a pergola to a concrete patio?
Use base plates or post bases specifically designed for concrete, secured with wedge anchors or sleeve anchors. Mark hole locations, drill with a hammer drill, and bolt the base down. Ensure the base is level and square before tightening. For windy areas, consider additional bracing or a structural engineer’s input. Pergola World offers hardware from Simpson Strong-Tie and OZCO.
Do I need a permit to build a pergola?
Permit requirements vary by municipality. Many areas require a permit for any structure over a certain height or square footage, and some have setback rules from property lines. Always check with your local building department before purchasing a kit. You are responsible for obtaining permit approvals.
How do you make sure pergola posts are level and square?
Start by establishing a level base using concrete footings or a prepared patio. Use a 4-foot level on each post as you set it, and check diagonals to ensure the frame is square. Brace posts temporarily until beams are installed. Careful measuring and bracing are essential for a square, level result.

