

Table of Contents
- How to Level a Pergola Frame: The Complete Sequence
- Preparing and Leveling Uneven or Sloped Ground
- Choosing Pergola Post Locations and Setting the Reference Post
- The Best Tools for Leveling Pergola Posts
- How to Shim Pergola Posts on Concrete
- How to Square a Pergola Frame With Diagonal Measurements
- Checking Beam Level and Installing Cross Members
- Troubleshooting a Leaning or Wobbly Pergola Frame
- Frequently Asked Questions
Last Updated: October 21, 2026
How to Level a Pergola Frame: The Complete Sequence
Knowing how to level a pergola frame means every post stands plumb and every beam sits at the same height, checked with a spirit level and confirmed by equal diagonal measurements.
Below, we’ll show you the full sequence in order, from site prep to the final square check. Get this right and the structure stands straight for decades.
Level the posts first, square the frame second, and check the beams last. Skip a step and you’ll fight the frame for the rest of the build.
What You’ll Need Before You Start
Gather your tools before you dig. Running back to the garage mid-build is how posts drift out of plumb.
Tools and materials:
- 4-foot spirit level (a 2-foot level is too short for posts)
- Tape measure, at least 25 feet
- Adjustable post bases (optional but helpful on concrete)
Tolerances to aim for: posts plumb within 1/8 inch over their full height, beams level within 1/8 inch across the span, and diagonals matching within 1/4 inch. Tighter than that is wasted effort on outdoor lumber.
Preparing and Leveling Uneven or Sloped Ground
Site preparation decides everything downstream. A frame built on sloped ground will lean, no matter how carefully you set each post.
Start by mapping the slope. Set stakes at each corner and run a string line between them. A line level on the string shows you the fall across the site. On gentle slopes, you have three options:
- Dig deeper on the high side so all post bottoms sit at one elevation
- Use longer posts on the low side and cut them to a common height later
- Set posts on raised concrete pads with adjustable bases on top
For a slope of more than a few inches across the footprint, the raised base approach saves the most digging. Compact the soil under each pad and check it with your level before the concrete sets.
Setting posts directly into loose, uncompacted soil is the most common cause of a frame that settles and leans within a year. Compact gravel under every post and check the base again before backfilling.
Choosing Pergola Post Locations and Setting the Reference Post
Post locations come from your drawing, not from eyeballing the yard. Measure twice from a fixed reference, like the house wall or a property line, and mark each hole with paint.
Pick one corner as your reference post and set it first. This post becomes the anchor for every measurement that follows.
- Dig the hole to depth, allowing for gravel and concrete
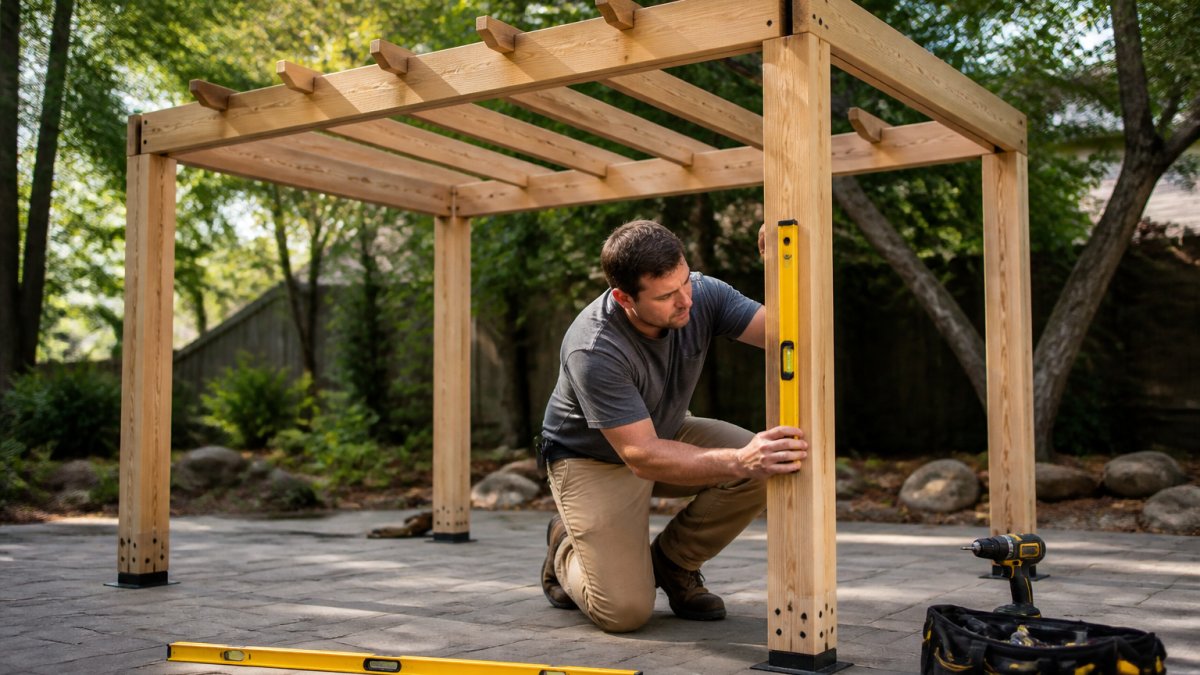
- Set the post and check plumb on two adjacent faces with your spirit level
- Brace the post temporarily with scrap lumber so it can’t move
- Recheck plumb, then backfill or pour concrete
Let the reference post cure fully before you set the others. Every other post gets measured from this one.
The Best Tools for Leveling Pergola Posts
The best tools for leveling pergola posts are a 4-foot spirit level, a string line, and a tape measure long enough to reach across the diagonals. Add a line level for checking beams and adjustable post bases if you’re building on concrete.
Here’s what each tool does:
- Spirit level: checks plumb on posts and level on beams
- String line: carries a height reference across the whole frame
- Line level: clips to the string to confirm beam height
A laser level helps on large frames, but it’s not required. The string line does the same job for a fraction of the cost.
How to Shim Pergola Posts on Concrete
Shimming is the fastest fix for posts on a concrete pad. Slide composite or cedar shims under the post base until the level reads true, then anchor through the base plate.
Work in this order:
- Loosen the anchor bolts slightly
- Tap shims into the low side until the post is plumb
- Check plumb on both faces
- Tighten the anchors and recheck
- Trim excess shim flush with a utility knife
Use composite shims outdoors. Wood shims absorb moisture and compress over time, which lets the post settle. If the gap is more than about 1/2 inch, switch to an adjustable post base instead of stacking shims.
Check plumb on two faces of each post, not one. A post can read plumb front-to-back and still lean side-to-side, and that lean shows up as a wobbly frame once the beams go on.
How to Square a Pergola Frame With Diagonal Measurements
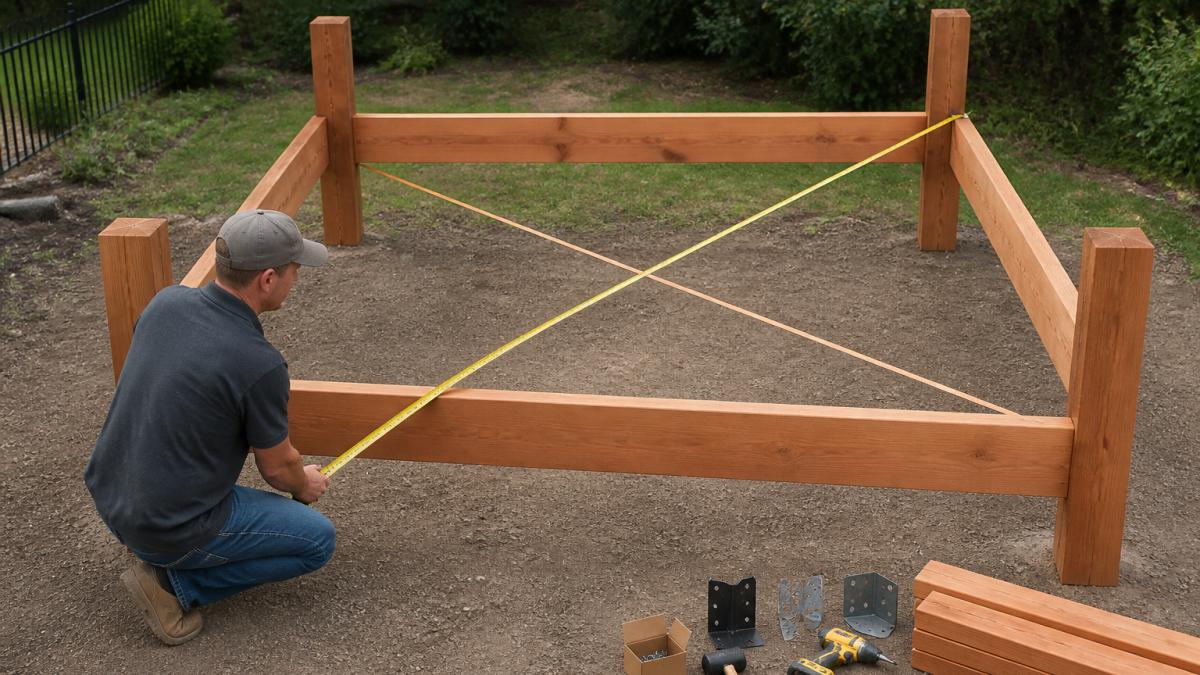
A pergola frame is square when the two diagonal measurements between opposite corners are equal. Measure corner to corner both ways. If the numbers match, the frame is square.
Set a tolerance before you measure
Aim for diagonals that match within 1/4 inch on a typical residential frame. On spans over 16 feet, 3/8 inch is a practical working tolerance for outdoor lumber that will move with the seasons. Tighter than that is wasted effort on material that expands and contracts. Write the two numbers down, memory is not a measurement.
The measurement sequence
- Measure from the outside corner of post A to the outside corner of post C. Record it.
- Measure from post B to post D. Record it.
- Subtract the smaller number from the larger. That difference is your out-of-square amount.
- Note which diagonal is longer. The frame is pushed toward the short-diagonal corner, so the long-diagonal corner needs to come back.
Correcting an out-of-square frame
Do not tighten hardware until the diagonals match. Work in this order:
- Loosen, don’t remove. Back off the beam-to-post bolts just enough that the frame can rack by hand.
- Push the long-diagonal corner. Have a helper push or pull the corner with the longer diagonal toward the opposite corner until the two measurements converge. A ratchet strap or a come-along between opposite corners gives you controlled force instead of guesswork.
- Re-measure both diagonals after every adjustment. Move in small increments, a quarter inch of corner movement changes the diagonal by roughly that much on a square frame.
Check square after every beam you install, not just once at the end. Each cross member you bolt in can shift the frame a little, and catching the drift early is far easier than chasing it after the whole frame is assembled.
When the diagonals won’t match
If you cannot get the diagonals within tolerance no matter how you push, the cause is usually post spacing rather than frame rack. Re-measure the distance between adjacent posts on both the long and short sides. A single post set an inch off its mark will make the diagonals impossible to equalize. Reset that post rather than forcing the frame.
Checking Beam Level and Installing Cross Members
Beam level comes last, and it’s a simple check, but only if you set a height reference before the first beam goes up. The unique part of this sequence is that you level the beams against a shared reference line, not against each other one at a time. That is how you catch a single high or low post before it propagates through the whole frame.
Establish a height reference first
Before any beam is installed, run a string line across the tops of the outer posts at the height where the beam will sit. Clip a line level to the string and adjust the stakes until the line reads level. This string is your datum, every beam check is measured against it, not against the beam next to it. Mark the string height on each post with a pencil so you can re-string if it gets bumped.
Install and check in this order
- Set the two outer beams first. Rest each beam on its posts and check the top edge against the string line. A beam that sits proud of the string means its post is high; a beam below the string means the post is low. Fix the post, not the beam.
- Check beam level along its length. Set your 4-foot spirit level on top of the beam and read the bubble. Beams should be level within 1/8 inch across the span. If a beam slopes, the cause is almost always a post height mismatch at one end, confirm with the string line before you cut anything.
- Add the inner cross members one at a time. After each one, check it against the string line and recheck the diagonals from the squaring section. Tightening bolts can shift the frame, so measure after every member.
Do not shim a beam to fix a slope. Shimming a beam hides a post height error and puts the load on the shim instead of the post. Correct the post, then recheck the beam against the string line.
Choosing the fix: cut, shim, or adjustable base
When a beam reads out of level, you have three correction options, and the right one depends on where the error is:
- Cut the high post. Best when a post is too tall by more than about 1/4 inch and the post is not yet anchored. Mark the cut line from the string line, cut, and recheck.
- Shim the low post. Best for small corrections, under about 1/2 inch, on posts already anchored to concrete. Use composite shims, not wood, because wood compresses over time.
- Switch to an adjustable post base. Best when the gap exceeds 1/2 inch or when you are building on a concrete pad and want future adjustability. Adjustable bases let you correct height with a threaded rod instead of cutting or stacking shims.
Use structural connectors rated for outdoor use. Simpson Strong-Tie and OZCO hardware are built for this, and Pergola World stocks both for custom-cut kits.
Troubleshooting a Leaning or Wobbly Pergola Frame
A leaning or wobbly frame almost always traces back to one of four causes. Diagnose before you start adjusting.
| Problem | Likely Cause | Fix |
|---|---|---|
| Post leans | Loose anchor or settled soil | Re-level with shims or reset the base |
| Frame wobbles | Missing or loose cross members | Add diagonal bracing, tighten hardware |
| Beam slopes | Post height mismatch | Trim the high post or shim the low one |
| Frame won’t square | Post spacing off | Re-measure from the reference post |
Diagonal bracing fixes most wobble. Add a temporary brace at 45 degrees across each corner while you work, and leave permanent bracing where the design allows.
If you’d rather not cut and fit every piece yourself, Pergola World’s custom-cut cedar and Douglas fir kits arrive with pre-cut profiles and pre-stained options, which removes the measuring errors that cause most leveling problems.
Frequently Asked Questions
How do you straighten a leaning pergola frame?
Loosen the fasteners at the base of the leaning posts, then use temporary diagonal braces to push the frame back toward plumb. Check each post with a spirit level on two faces, re-tighten the anchors, and confirm the frame is square by comparing both diagonal measurements. If the lean comes from the footing rather than the frame, you may need to adjust the post base or add shims under the low side before locking everything down.
What tools do you need to level a pergola frame?
At minimum, you need a 4-foot spirit level, a tape measure long enough to span your diagonals, a cordless drill, and a rubber mallet. A laser level speeds up post alignment across a large frame, and composite shims or adjustable post bases handle small height differences. Add a speed square for beam cuts and temporary diagonal braces to hold the frame steady while you fasten it.
Can you level a pergola on sloped concrete?
Yes, but the method depends on the slope. For small differences under about half an inch, composite shims under post bases work well. For larger slopes, use raised bases or post extensions on the low side, or cut the posts to match the slope. Never stack more than a few shims, and always anchor through the shimmed base into the concrete so the post cannot shift.
How do you square a pergola frame during assembly?
Measure both diagonals from corner to corner across the frame. A square frame has equal diagonals; if one is longer, push the longer diagonal’s corners inward until the measurements match. Clamp temporary diagonal braces across the frame to hold it square, then tighten all beam and post fasteners. Re-check the diagonals after fastening, since tightening hardware can pull the frame slightly out of square.
